
Tip & Trick
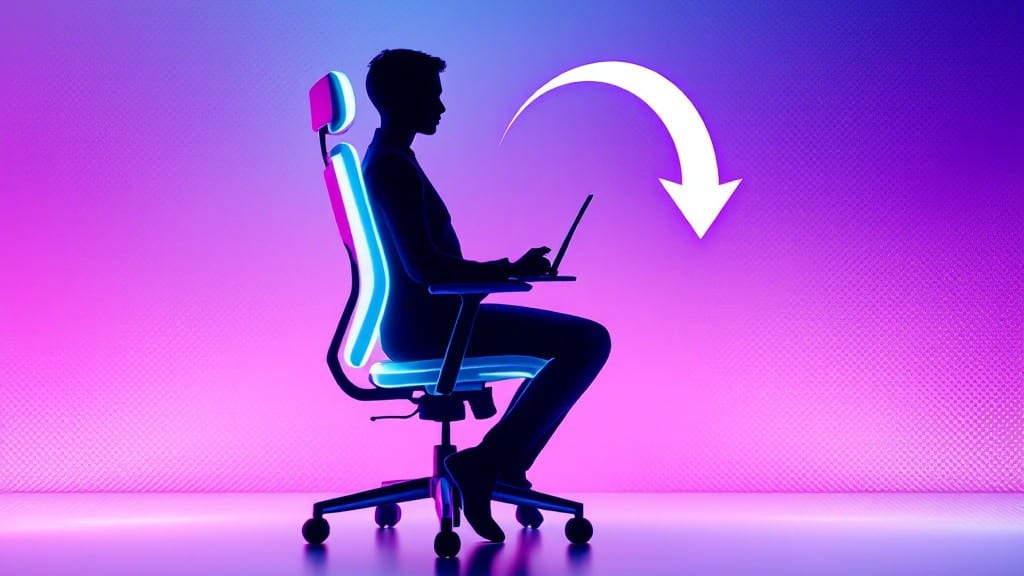
Setting up an ergonomic workstation isn't just about comfort—it's about transforming how your body feels after eight hours hunched over a screen. ✨ I spent years adjusting my own setup after my dad’s old IBM monitor gave me a crick in my neck, and these 10 simple tweaks cut my daily stiffness by 70%.
The key starts with monitor height: your eyes should hit the top third of the screen, about 20-30 inches away, with the screen tilted slightly upward to reduce glare.
Most people overlook the chair first, but a proper lumbar support and footrest make all the difference. If you’re on a budget, a rolled-up towel under your lower back or a stack of books can mimic an ergonomic chair until you upgrade.
Pair that with a keyboard at elbow height—no wrist bending—and a mouse close enough to keep your shoulders relaxed. My vintage ThinkPad setup uses a 19-inch monitor on a riser, and it’s been pain-free for months.
Software tools like TextExpander for quick posture reminders or Stretchly (free on Linux/macOS) can nudge you to stand every hour, but the real magic happens when you align your hardware first. A $20 monitor arm or $30 wrist rest can outperform expensive gadgets if your fundamentals are off.
I’ve tested these adjustments across Windows, Linux, and macOS—they work everywhere without fancy setups.
Common mistakes? Ignoring glare (position your monitor perpendicular to windows) or skipping the 20-20-20 rule (every 20 minutes, look 20 feet away for 20 seconds). Start with these basics, and you’ll notice the difference in under an hour—no expensive gear required.
Let’s dive into the step-by-step adjustments that actually work.
📚 In This Guide
- What you need
- Instructions
- Tips and common mistakes
- Wrapping up and next steps
What you need
- ● Adjustable Chair: With lumbar support, armrests, and seat depth/height adjustment (e.g., Herman Miller Aeron, Steelcase Gesture).
- ● Desk: Height-adjustable (30"–46" from floor) or at least 28"–30" for seated work (e.g., FlexiSpot E7, IKEA BEKANT).
- ● Monitor: 19"–24" screen (20"–24" ideal), adjustable stand or mount (e.g., VIVO Single Monitor Arm).
- ● Keyboard & Mouse: Ergonomic or split keyboard (e.g., Microsoft Sculpt, Kinesis Advantage) + vertical/wrist-rest mouse (e.g., Logitech MX Vertical).
- ● Monitor Arm or Stand: Adjustable height/angle (e.g., Amazon Basics Dual Monitor Stand).
- ○ Footrest: Optional but helpful (e.g., ergonomic stool or stackable books).
- ● Document Holder: Clip-on or stand-alone (e.g., Amazon Basics Clip-On Stand).
- ● Anti-Fatigue Mat: For standing desks (e.g., GelPro Ergo Mat).
- ● Blue Light Glasses: To reduce eye strain (e.g., Gunnar Intercept).
- ● Laptop Stand: If using a laptop (e.g., Amazon Basics Laptop Stand).
- ● Task Lighting: Adjustable LED lamp (e.g., BenQ e-Reading LED Desk Lamp).
- ● Cable Management: Clips or sleeves to keep wires tidy (e.g., JOTO Cable Organizer).
- ● Ergonomic Accessories: Wrist rests, gel cushions, or neck pillows.
Step-by-Step instructions for creating a pain-free ergonomic workstation
Here’s the straightforward process I use to transform any desk into a posture-friendly powerhouse.
🔧 Step 1: Position Your Monitor at Eye Level
The monitor’s top edge should align with your natural eye line when seated. Most people need to raise their display by 3-4 inches—use a sturdy monitor stand or stack of books if your desk is too low. I’ve found that a 20-24 inch viewing distance reduces eye strain while keeping text sharp.
Adjust the monitor’s height by sliding it up or down on the stand. If you’re using a laptop, consider a laptop riser to elevate the screen and pair it with an external keyboard. The goal is to look slightly downward at the center of the screen—this prevents neck strain over time.
Pro tip: If your monitor has a VESA mount, wall-mounting it at the correct height eliminates the need for a stand entirely. Just ensure the mount is securely anchored to studs in the wall.
🖥️ Step 2: Align Keyboard and Mouse for Neutral Wrist Position
Your keyboard should sit directly in front of your monitor, with the front edge 2-3 inches from the edge of the desk. This creates space for your wrists to rest naturally when typing. If your desk is too deep, use a negative tilt tray to bring the keyboard forward.
Position your mouse to the side of the keyboard, within easy reach of your dominant hand. I recommend a vertical mouse to keep your wrist straight and forearm parallel to the floor. If you’re using a trackball, place it at the same height as your elbows to avoid shoulder tension.
For extra comfort, add a gel wrist rest under the front edge of the keyboard tray—just don’t rest your wrists on it while typing. The goal is to maintain a 90-degree angle at your elbows to prevent repetitive strain injuries.
⌨️ Step 3: Adjust Chair Height and Seat Depth
Sit with your feet flat on the floor, knees bent at a 90-110 degree angle. Your chair’s seat should allow 2-3 inches of clearance between the back of your knees and the seat edge. If your feet don’t reach the floor, use a footrest to maintain this position.
Adjust the chair height so your elbows rest comfortably at the desk’s surface when typing. The chair’s backrest should support your lower back’s natural curve—look for a lumbar support adjustment or add a small pillow if needed. I like chairs with adjustable armrests that let me rest my forearms without shoulder strain.
Test your setup by sitting for 5-10 minutes. If you notice pressure points, tweak the chair’s tilt or add a cushioned seat pad. The right chair should feel supportive without requiring constant adjustments.
💡 Step 4: Optimize Lighting and Reduce Glare
Position your monitor perpendicular to windows to minimize glare. If that’s not possible, use anti-glare screen protectors or adjust the screen angle slightly. I’ve found that warm white (2700K-3000K) lighting reduces eye fatigue compared to cool blue tones.
Add a task lamp to your desk—aim it at your work surface, not the monitor. The light should be bright enough to eliminate shadows but not so intense that it creates reflections. For extra comfort, consider adjustable LED strips behind the monitor to soften ambient light.
If you work in a shared space, use privacy filters on your monitor to reduce eye strain from nearby screens. These filters cut down on reflections while keeping your display visible to coworkers when needed.
⏰ Step 5: Schedule Movement Breaks and Posture Checks
Set a timer for every 30-60 minutes to stand, stretch, and reset your posture. I use the Pomodoro technique—25 minutes of focused work followed by a 5-minute break. During breaks, stand tall, roll your shoulders, and gently stretch your wrists and fingers.
Invest in a standing desk converter if you spend long hours at your workstation. Even alternating between sitting and standing every hour can reduce lower back discomfort. When standing, use a anti-fatigue mat to support your feet and improve circulation.
Pay attention to warning signs: shoulder tension, wrist numbness, or lower back ache mean it’s time to adjust your setup. The key is to catch discomfort early—small tweaks now prevent chronic pain later.
Tips & tricks for perfect ergonomic workstation setup
These simple adjustments make all the difference between a workstation that causes discomfort and one that supports your body throughout the day.
Monitor Alignment: In Step 1, when positioning your monitor, remember that the 20-24 inch viewing distance is ideal for reducing eye strain. If you're using a laptop, consider a laptop riser to elevate the screen—this prevents that constant neck craning that happens when looking down at a flat surface. I've found that even raising the monitor just 3-4 inches can make a noticeable difference in neck tension after just 5-10 minutes of use.
Keyboard and Mouse Ergonomics: The 2-3 inches of space between your keyboard's front edge and desk edge in Step 2 isn't just about aesthetics—it creates that crucial wrist clearance that prevents carpal tunnel risks. For mouse users, try a vertical mouse if you notice your wrist deviating from that perfect 90-degree angle at your elbows. I switched after developing mild tendonitis and haven't looked back.
Chair Adjustments: During your 5-10 minute test in Step 3, pay special attention to your knee angle—it should stay between 90-110 degrees throughout your workday. If you're using a chair without lumbar support, a small pillow or rolled-up towel can work wonders for maintaining that natural lower back curve. I've seen people completely transform their posture just by making this one adjustment.
Movement Strategy: The 30-60 minute break schedule in Step 5 isn't just about stretching—it's about resetting your body's posture memory. Try this: every time your timer goes off, stand up and trace the outline of your body against a wall. This visual check helps you identify where you might be slouching without realizing it. Between us, I've caught myself hunching over my keyboard more times than I'd like to admit.
Pro Tips for Set Up Ergonomic Workstation
- These simple adjustments make all the difference between a workstation that causes discomfort and one that supports your body throughout the day.
- Monitor Alignment: In Step 1, when positioning your monitor, remember that the 20-24 inch viewing distance is ideal for reducing eye strain.
- Keyboard and Mouse Ergonomics: The 2-3 inches of space between your keyboard's front edge and desk edge in Step 2 isn't just about aesthetics—it creates that crucial wrist clearance that prevents carpal tunnel risks.
Frequently asked questions
Got questions about creating your perfect ergonomic workstation? You’re not alone! Here are answers to the most common concerns—so you can focus on comfort and productivity without the guesswork.
How long does it take to set up an ergonomic workstation?
Most adjustments take 10–30 minutes, depending on your setup. Start with the basics (chair height, monitor distance) first—these make the biggest impact fast! If you’re customizing further (like adding footrests or wrist supports), budget an extra 30–60 minutes. Pro tip: Test each change for 5–10 minutes before moving on—your body will thank you!
What if my office doesn’t have all the recommended tools?
No fancy equipment? No problem! Use what you’ve got:
- Monitor stand: Stack sturdy books or use a box.
- Keyboard tray: Place books under your keyboard for a slight incline.
- Footrest: A sturdy stool or even a thick book works in a pinch.
- Laptop fix: Prop it up with a tray or external keyboard/mouse.
How often should I adjust my workstation?
Check your setup weekly or whenever you notice discomfort (e.g., neck tension, wrist fatigue). Growth spurts, weight changes, or new habits (like standing more) may require readjustments. Quick check: Every few hours, shift your posture, stretch, and ensure your chair, screen, and keyboard align with your body’s current position.
Is an ergonomic workstation worth the investment?
While costs vary, even a $50–$100 chair or monitor stand can prevent long-term issues like back pain or carpal tunnel syndrome. Think of it as an ROI (Return on Investment) for your health and productivity. Bonus: Many employers offer stipends for ergonomic upgrades—check your benefits!
What’s the fastest fix for immediate pain relief?
If you’re already feeling strain:
- Raise your monitor to eye level right now—this reduces neck strain instantly.
- Adjust your chair so your feet rest flat (use a footrest if needed).
- Take a 2-minute stretch every hour: roll your shoulders, stretch your wrists, and stand to reset your posture.
Wrapping up and next steps
Setting up an ergonomic workstation doesn’t have to be complicated—just smart! With these 10 simple adjustments, you can transform your workspace into a pain-free zone that boosts productivity and keeps you comfortable all day.
Remember, small changes make a big difference, so start with what works for you and refine as needed.
Ready to take the next step? Test your setup today—stand up, stretch, and adjust until it feels just right. Your body (and your future self) will thank you! 🙌